Top Tips To Reduce Wasted Google Ad Spend

As Google Ads account managers or business owners, we rely heavily on data to analyze and optimize campaigns for best results and ROI on ad spend. If overlooked, a small oversight could cost thousands of dollars in wasted ad spend. According to a 2016 study published in Search Engine Journal, about 76% of ad budget is wasted on the wrong search terms for most businesses. Here are three main reports that you can use to make sure you do not waste your ad budget.
REVIEW THE SEARCH TERM REPORT
This is different from your keywords. Keywords are the search queries that you are bidding on and can be exact matches, phrase matches, or broad matches. Search terms are the exact words that the potential customers type into the search engine when they see your ads
You can make many improvements to your campaign just by looking at the search term report.
How to find your search term report in the Google Ads Dashboard
- Sign in to your Google Ads account.
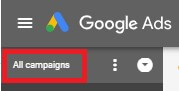
- Click “All Campaigns” in the navigation pane on the left, then click “Keywords” in the page menu.
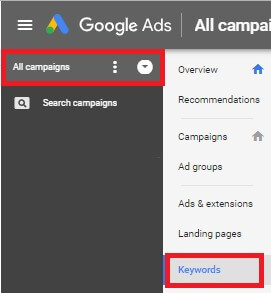
- Click “Search Terms” at the top of the page.

- You’ll see data on which search terms triggered impressions and clicks.
Source: https://support.google.com/google-ads/answer/7531771
You will notice that your campaign is showing ads for search terms that differ from your search keywords.
Example:
If you are selling widgets and your target search keyword is “widgets for sale,” your ads might also come up if a person types “how widgets are made.” This search does not have the intention of making a purchase, and we do not want to show ads to those users.
You should add “how widgets are made” as a negative keyword to prevent clicks on your ads for that keyword. Negative keywords allow you to exclude your ads from showing up for specific search terms. Analyzing your search term report and adding tentative search terms will prevent waste in your budget from searches that are irrelevant to your business.
How to add negative keywords to your campaign:
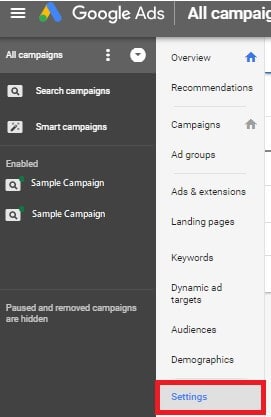
- Sign in to your Google Ads account.
- Click “Keywords” on the page menu on the left.
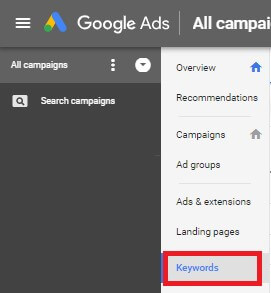
- Click “Negative Keywords.”

- Click the plus button.
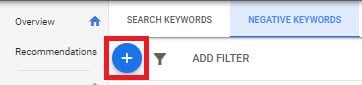
From here, you can add new keywords, a negative keyword list, or an existing negative keyword list to your campaigns or ad groups.
Add Negative Keywords to Ad Groups, Campaigns, and Negative Keyword Lists
- Click “Add negative keywords” or create a new list.

- Choose whether to add negative keywords to a campaign or ad group and then select the specific campaign or ad group.
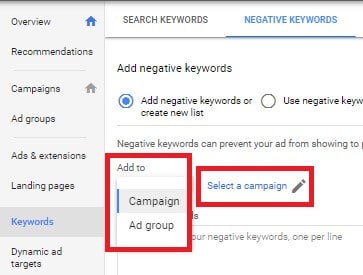
- Add one keyword per line. Make sure that your negative keywords don’t overlap your regular keywords because this will cause your ad not to show. Note: If you’re adding negative keywords to a search campaign, you can choose a match type by using the appropriate symbols. For Display and Video campaigns, all negative keywords will be added as exact matches, and you won’t be able to change the match type.
- If you’re adding your negative keywords to a campaign, you have the option to save the keywords to a new or existing negative keyword list and apply that list to the campaign. Click “Save” on a new list and enter a name for your new list, or select an existing list.
- Click “Save.”
Source: https://support.google.com/google-ads/answer/7102995
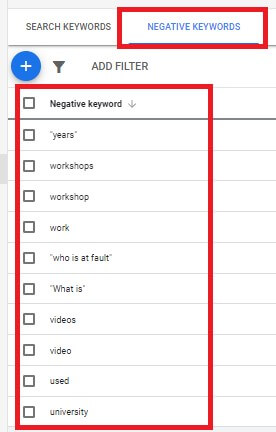
BONUS: Here is a commonly used list of negative keywords that you can add to your campaign. Make sure to review this list carefully and delete any keywords that you do want your ads to show up on.
LOCATION TARGETING
Location targeting in Google Ads displays your listing to people in specific geographical areas. Refining your location targeting can help reduce spending and increase your return on investment (ROI) by showing ads to the right people in areas that are most likely to convert. You can see the actual physical location of your users by looking at the “User Location Report.”
How to view location reports
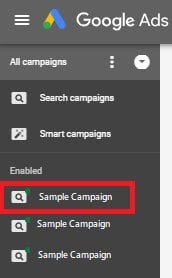
- In the left page menu, click Campaigns.

- Find the campaign whose location report you want to see, and click its name. If you don’t select a campaign, the location report will be for your entire account.
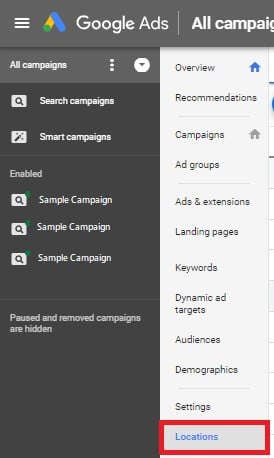
- Click Locations in the left page menu.
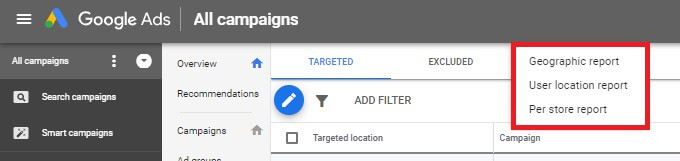
- Click Geographic Report along the top of the page, and select a location report type: Geographic or User locations. Your data will be displayed by location.

- To drill down to a different geographic level, check the box next to one or more of the locations in the table, then click the Select view drop-down in the blue banner that appears along the top of the table. You’ll be able to view data for the location target types that are available for all of the selected locations. You can continue to refine your report by selecting locations and clicking the “Select” view drop-down.
Source: https://support.google.com/google-ads/answer/7492954
The User Location Report will show you the actual physical location of your potential customers by country, state, city, and zip code. Go through these reports to ensure that people are not coming from areas that are not profitable to your business.
Pay close attention to the amount of traffic you get from each region and your cost per conversion. You can use this data to adjust your budget toward well-performing areas and away from areas that are irrelevant or not profitable for your business.
Here are instructions to exclude locations from your targeting:
- From the page menu on the left, click “Campaigns.”
- Click the name of the campaign you wish to edit.

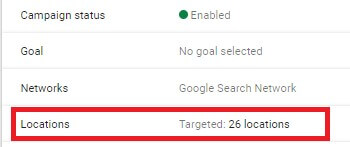
- Click “Settings.”
- Expand the “Locations” section from the settings menu.
- There are two ways you can exclude a location:
- Search for the area that you’d like to exclude in the search box and click “Exclude.”
- Click “Advanced search,” search for the location you’d like to exclude, and click “Exclude.” Click “Save” after excluding the location.

- Click “Save” to save your settings. Your excluded locations will appear under the heading “Excluded locations.”

Source: https://support.google.com/google-ads/answer/1722040
“TIME OF DAY” AND “DAY OF THE WEEK” ANALYSIS
The “Time of Day” and “Day of the Week” dashboards allow you to see your campaign performance and modify your bids during different times and days or days of the week. This dashboard will enable you to analyze when your clicks are more likely to convert and when they have historically led to poor performance.
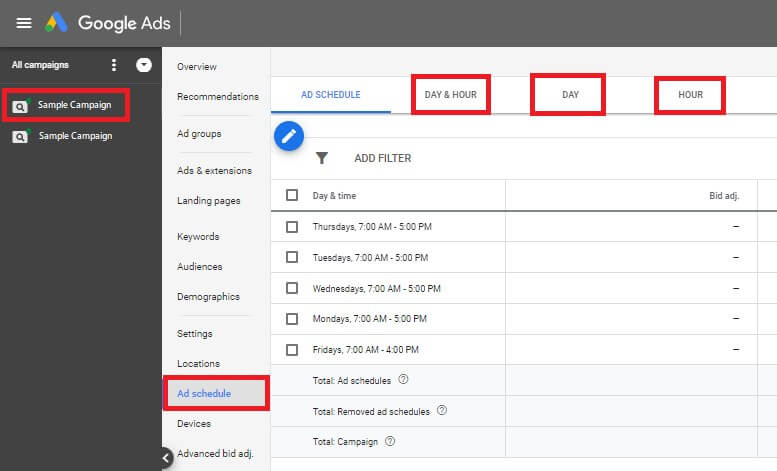
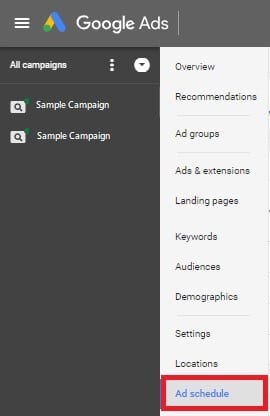
You can find your ad schedule on the left page menu under “Ad schedule.” This dashboard will show when your ads are showing up. From there, on the top menu, you will find the “Day & Hour,” “Day,” or just “Hour” tabs that will show how many impressions, clicks, and conversions your campaign has received during different times of day and days of the week.
Take your time and carefully examine these dashboards. Look for patterns that reveal when you are receiving the most and least conversions. Also, pay attention to your cost per conversion. You will find that on specific days or during certain times, your campaign performs much better—or worse—than average.
Make bid adjustments to ensure that you are not running ads when you have historically low or no conversions. For example, if you are running ads 24/7 and historically you received no conversion in the middle of the night, make time adjustments to not show ads then.
How to review your Google ad schedule
- From the page menu on the left, click Ad schedule.

- From the table, select a campaign to see its ad schedule, performance, and costs during its scheduled time slots.
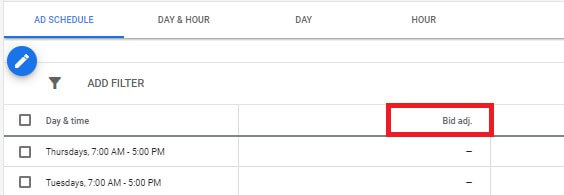
- You’ll see a chart that shows the times your campaign’s ads showed. By default, the chart will show the number of clicks your ads received.
- To see your campaign’s impressions, CTR, average CPC, or cost, select the metric you’d like to see from the clicks drop-down in the top right corner.
- Choose a subtab to review your ad schedule and performance by “Day and Hour,” “Day,” or “Hour.”

Source: https://support.google.com/google-ads/answer/6372656
How to set up ad schedule bid adjustments:
- Sign in to your Google Ads account.
- Click Campaigns in the page menu.

- Click the name of a campaign with a bid you’d like to adjust.

- Click Ad schedule on the page menu.
- Locate the row for the scheduled time that you want to adjust, and click the pencil icon in the “Bid adj.” column.
- Choose Increase or Decrease from the drop-down menu, and enter a number.

- Click Save.
Source: https://support.google.com/google-ads/answer/6372644
CONCLUSION
Carefully and regularly review your campaign’s performance to reduce the wasted ad spend. Double-check your conversion settings, since conversions and cost per conversion are a great indicator of campaign performance.
If you need assistance in managing your Google Ads campaign, reach out to one of our pay-per-click management strategists, and we will see how we can help to improve your Google Ad account’s return on investment.